
Getting started
Quickstart
Integrating Speechineer into a form you already have is a straightforward process. In this guide, you will configure a form in your workspace, create an Unsigned API key, add one button to talk to the form in your app, and speak your first values into it. Each step also names the page to read when you want more — a form defined in code, Signed keys behind a login, accounts and quotas — so you can treat this page as both the shortest path and a map of what else you can set up.
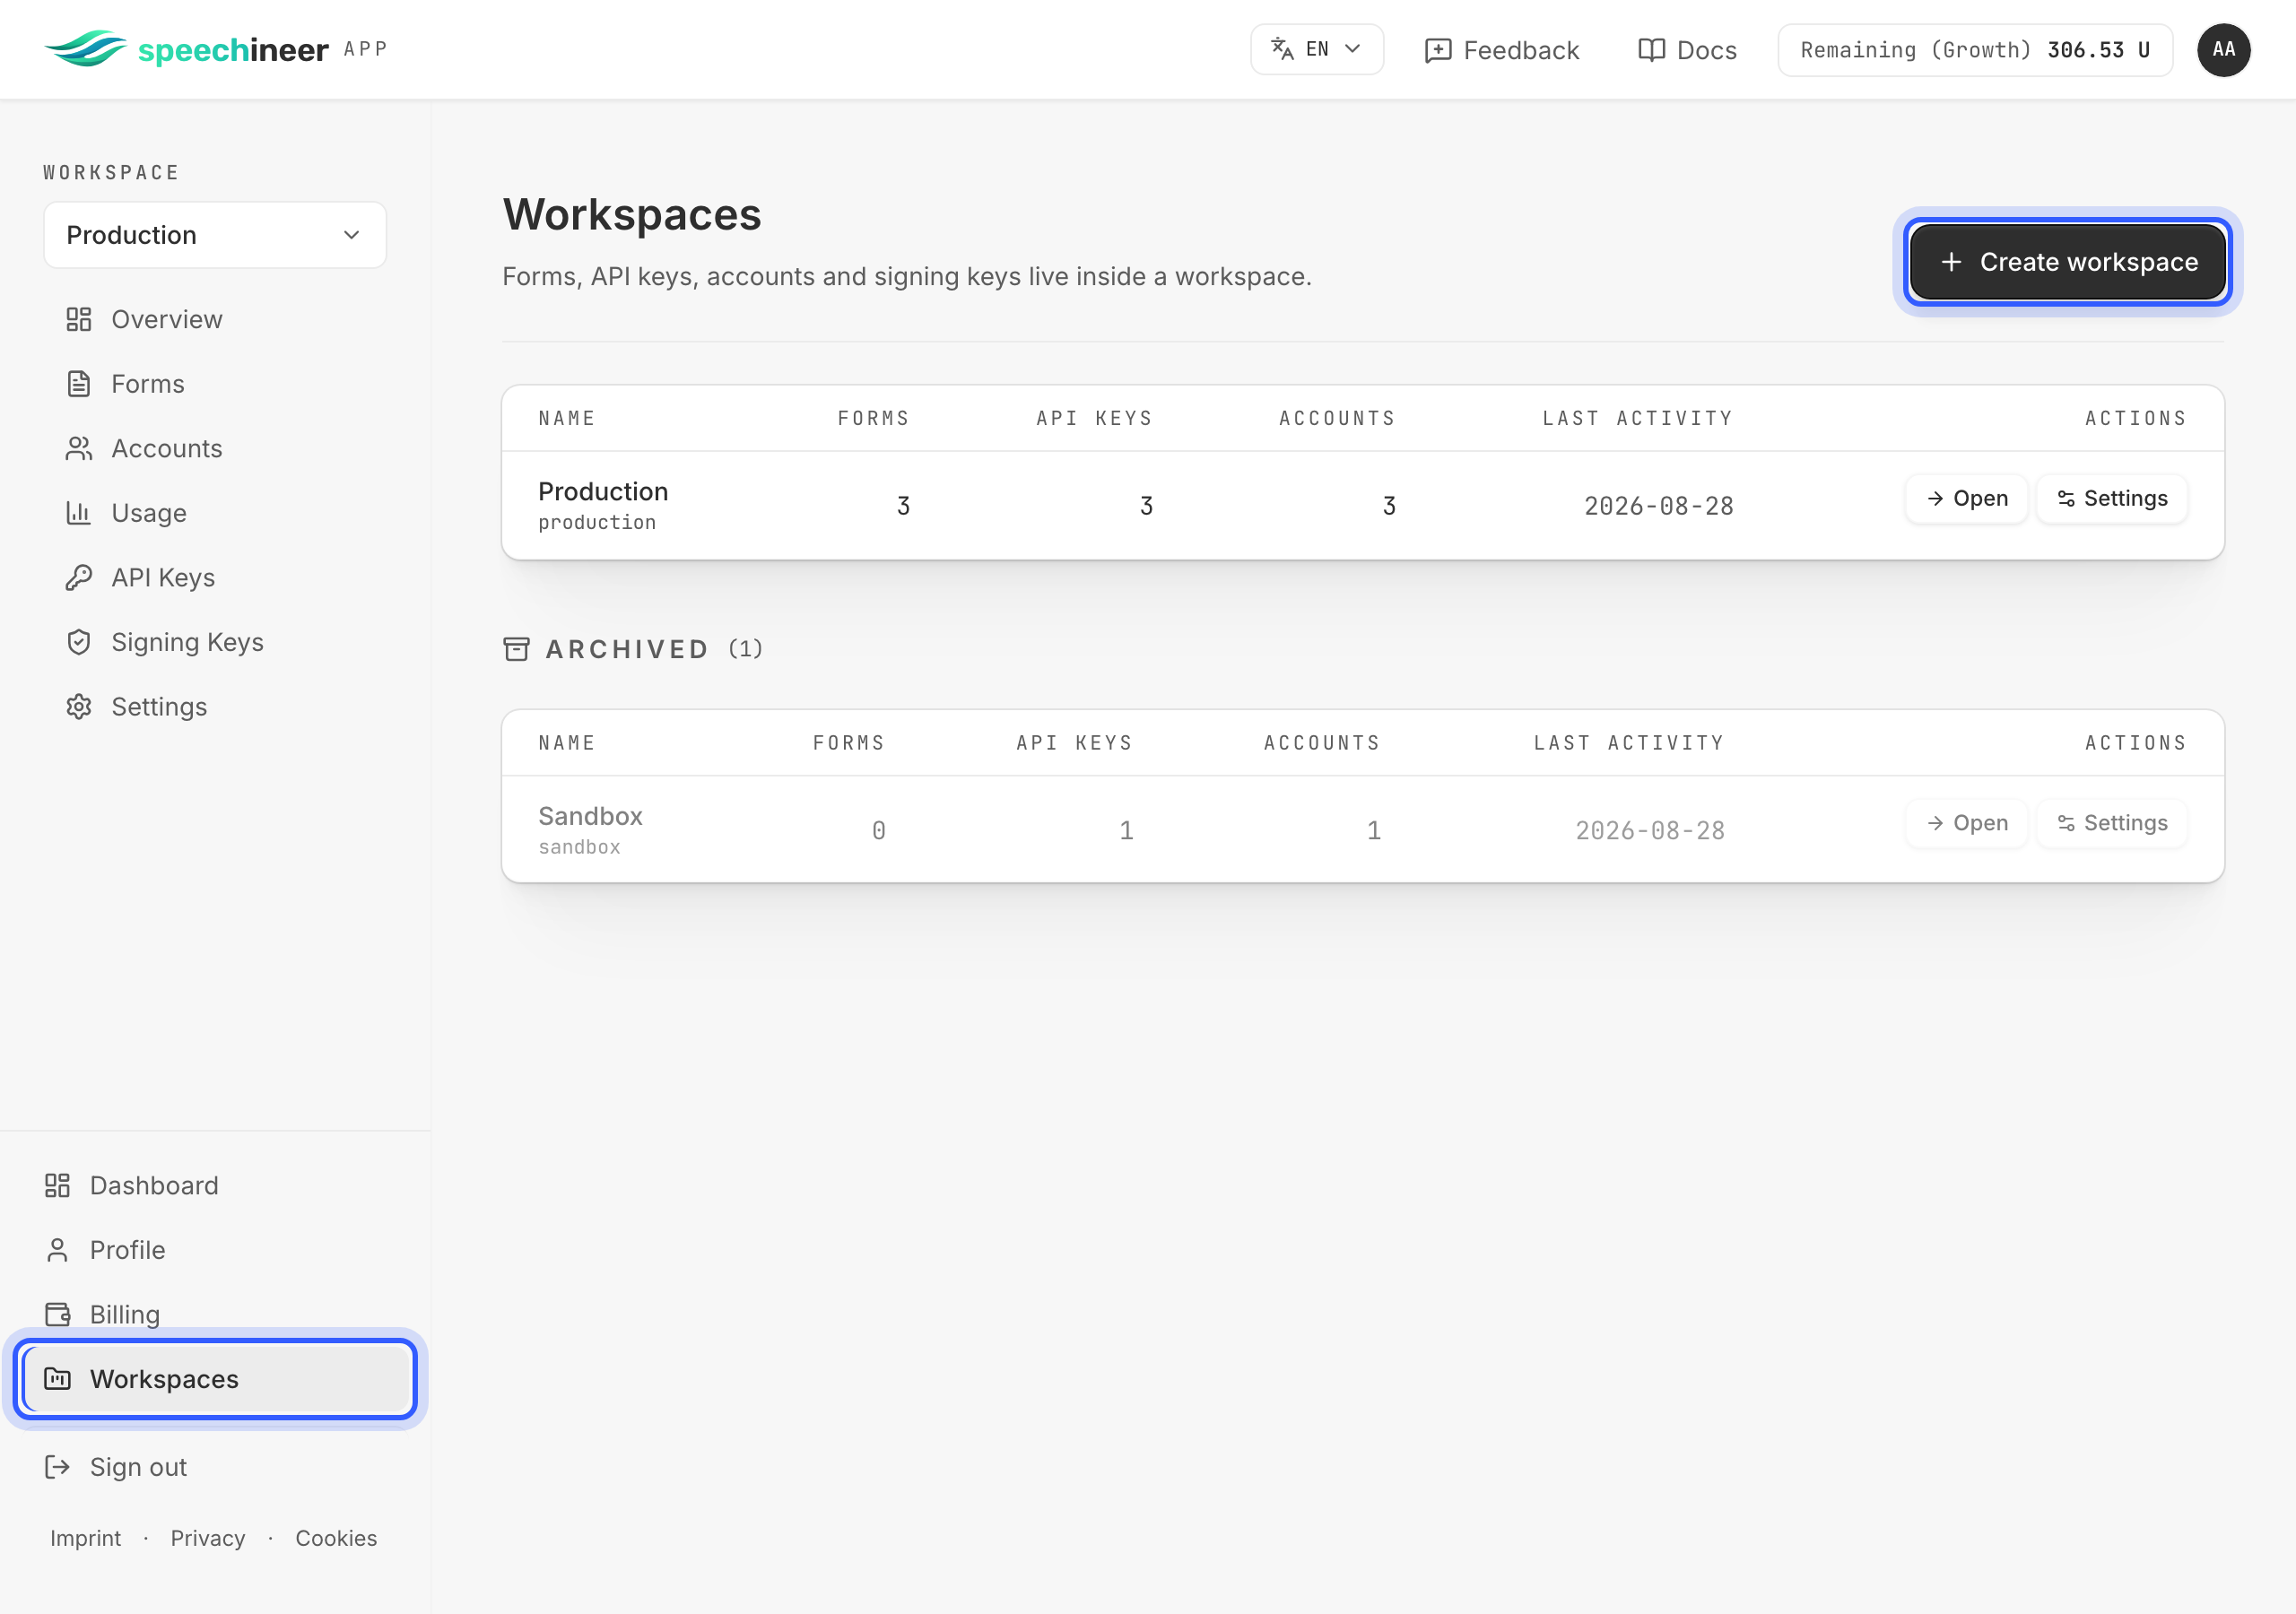
1. Create a workspace
Open Workspaces and create one for the piece of software you are integrating — an app, a service, a component. Everything you do next lives inside it: the forms, the API keys and signing keys, the accounts, and the limits, so that usage is reported per piece of software.
Note
2. Create the form and publish a version
Open Forms and create a form.
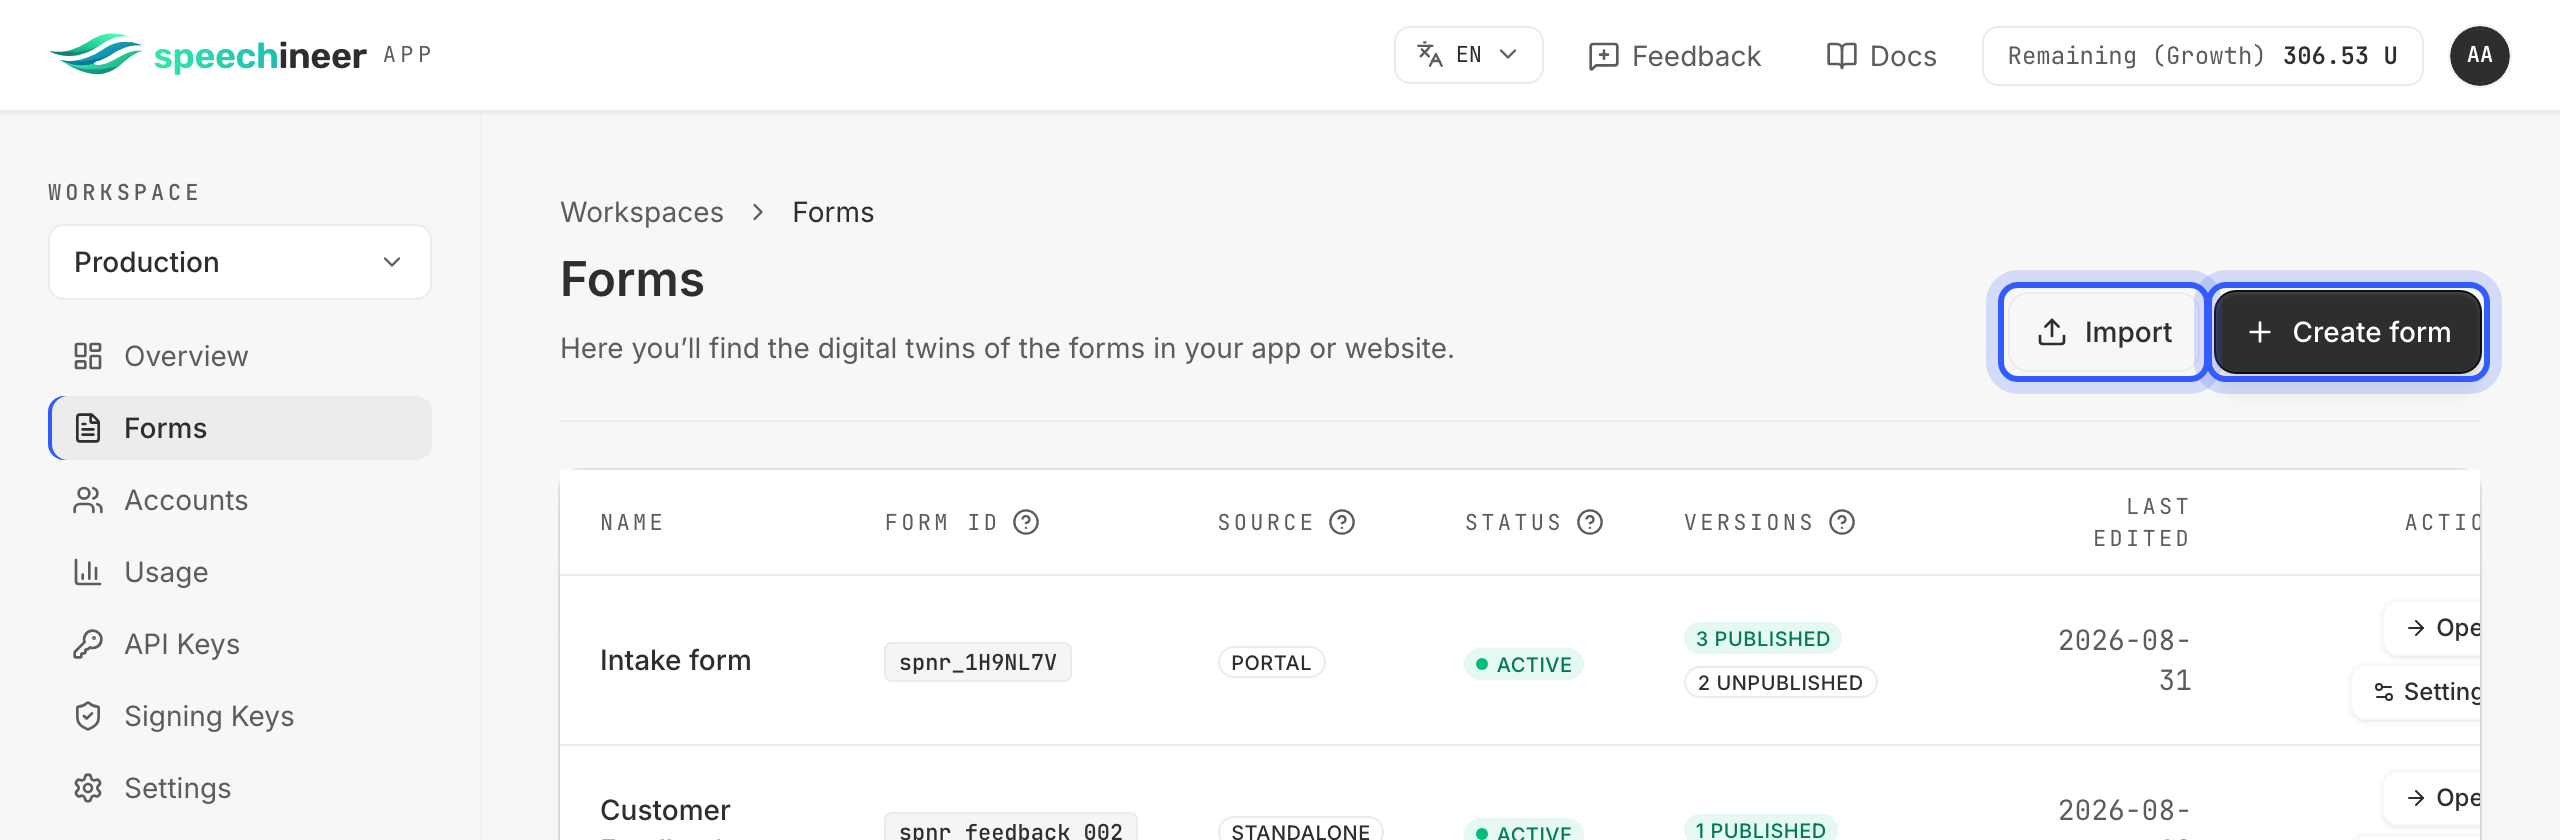
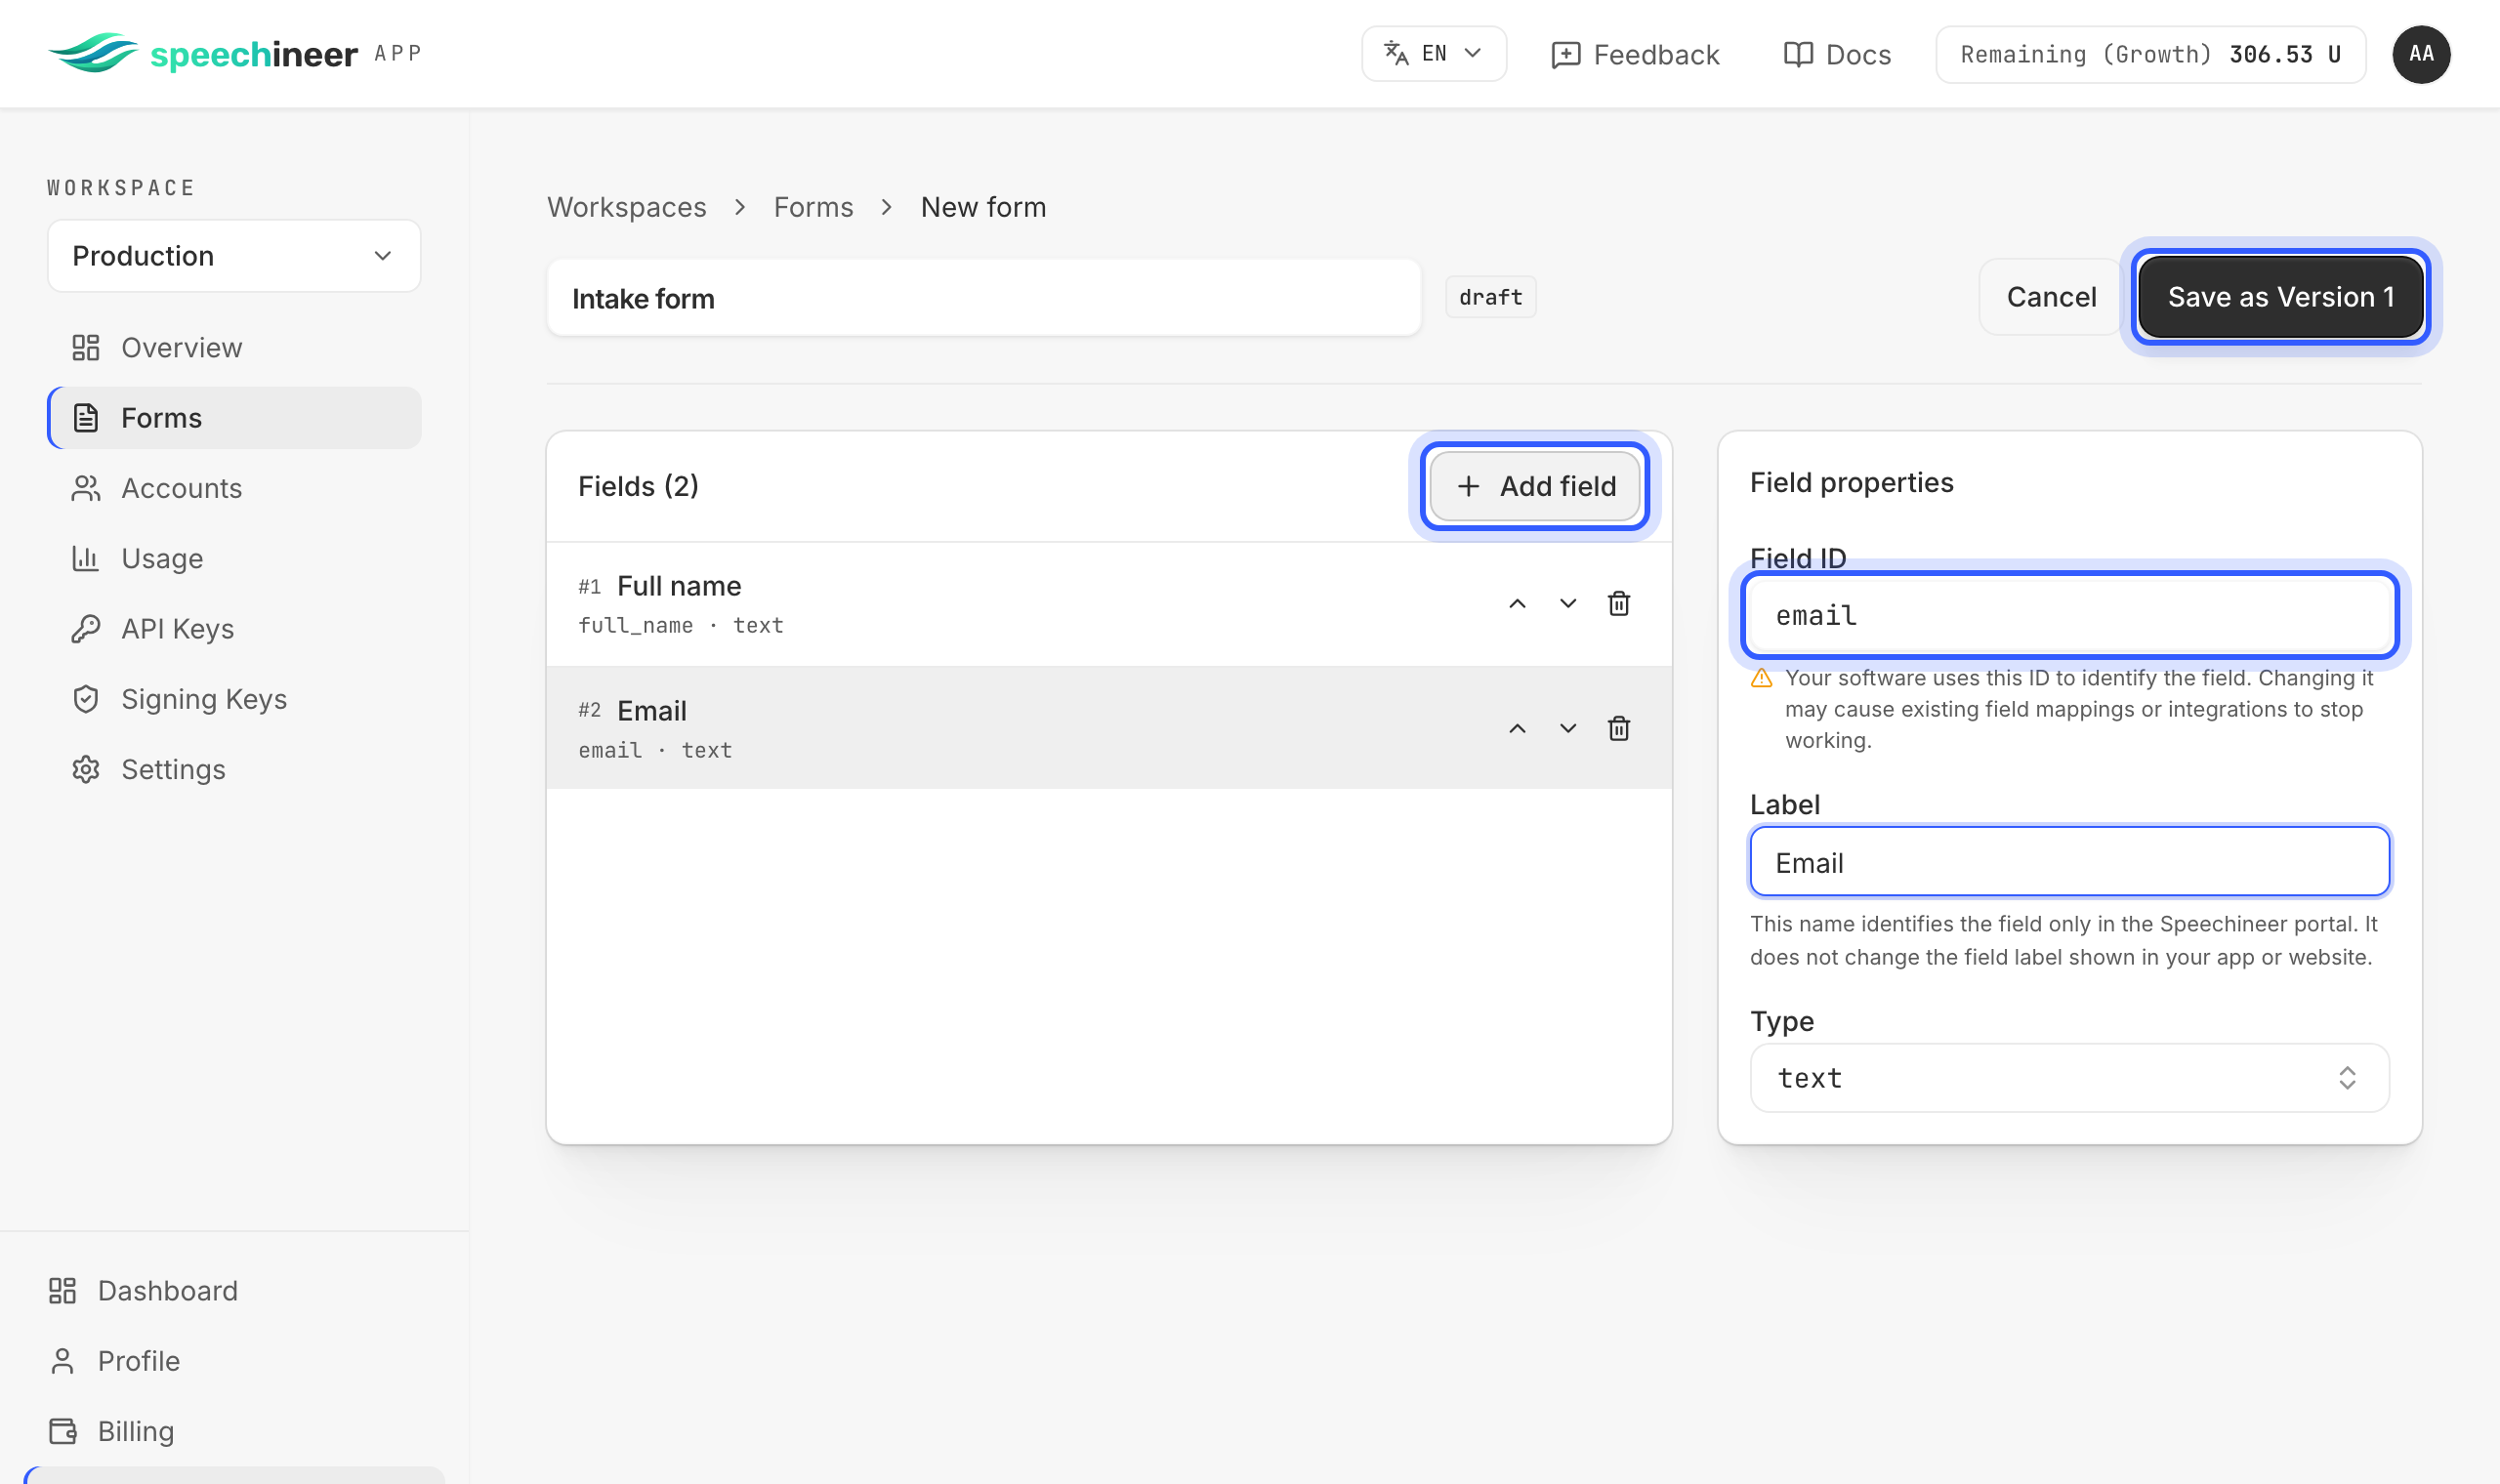
Add one field per input your form has, give every field a short prompt that says what to extract, then save. The only thing that must match your code is each field's id.
Warning
Alternatively, if you already have this form in your codebase, you can import it instead of retyping it: paste the prompt below into your AI coding agent together with the form — a component file, a screenshot, a schema — and it returns the import JSON with your real field ids; then click Import next to Create form and drop that JSON in.
You are converting an existing form into a Speechineer form-import JSON. The form is
whatever I give you as context: a screenshot, an HTML/JSX/Vue/Angular/Svelte template, a
form-library schema, a database table, or a description. If I gave you a repository, find
the form and read the real field names.

Return one JSON document per form: {"name": "...", "fields": [...]} — with per field:
- "field_id" (required): the identifier my application already uses for that field — the
  name/id attribute, the form-control key, the column name. Copy it EXACTLY, including
  camelCase; never tidy it into another style. It must start with a letter and contain
  only letters, digits or underscores. Only invent an id (from the label, snake_case)
  when I gave you no code.
- "label": the human name of the field.
- "type": one of text, textarea, email, phone, url, integer, float, checkbox, date, time,
  datetime, select, multiselect, slider. The control wins over the meaning: an
  <input type="range"> is a slider even when it counts something.
- "options": the exact stored values for select/multiselect (the value, not the display
  label) — required for those types, at least one. Otherwise null.
- "range": [min, max] for slider — required for it. Otherwise null.
- "code_defined_config": true ONLY when the values are not fixed at design time (options
  from my database, or that change per user or language). Still include representative
  options/range — the form is tested against them in the workspace; at runtime my code
  supplies the real ones. When torn, use false.

Do not include prompts in the JSON — the import carries the form's shape only; extraction
prompts are written in the workspace afterwards. Instead, list under the JSON one suggested
extraction prompt per field (one sentence: what to pull out and how to resolve what a
speaker says — units, formats, relative dates), for me to paste into the workspace.

Skip fields nobody would speak: passwords, one-time codes, card numbers, captchas, file
uploads. Name what you skipped. Make reasonable choices instead of asking questions, and
list the assumptions you made.
After saving, open the Engineer tab to write and test the prompts. A prompt is the instruction that tells extraction what to put in a field — "the caller's full name", "the appointment date, as a date" — and Engineer lets you speak against the form and watch what lands, before any code exists.
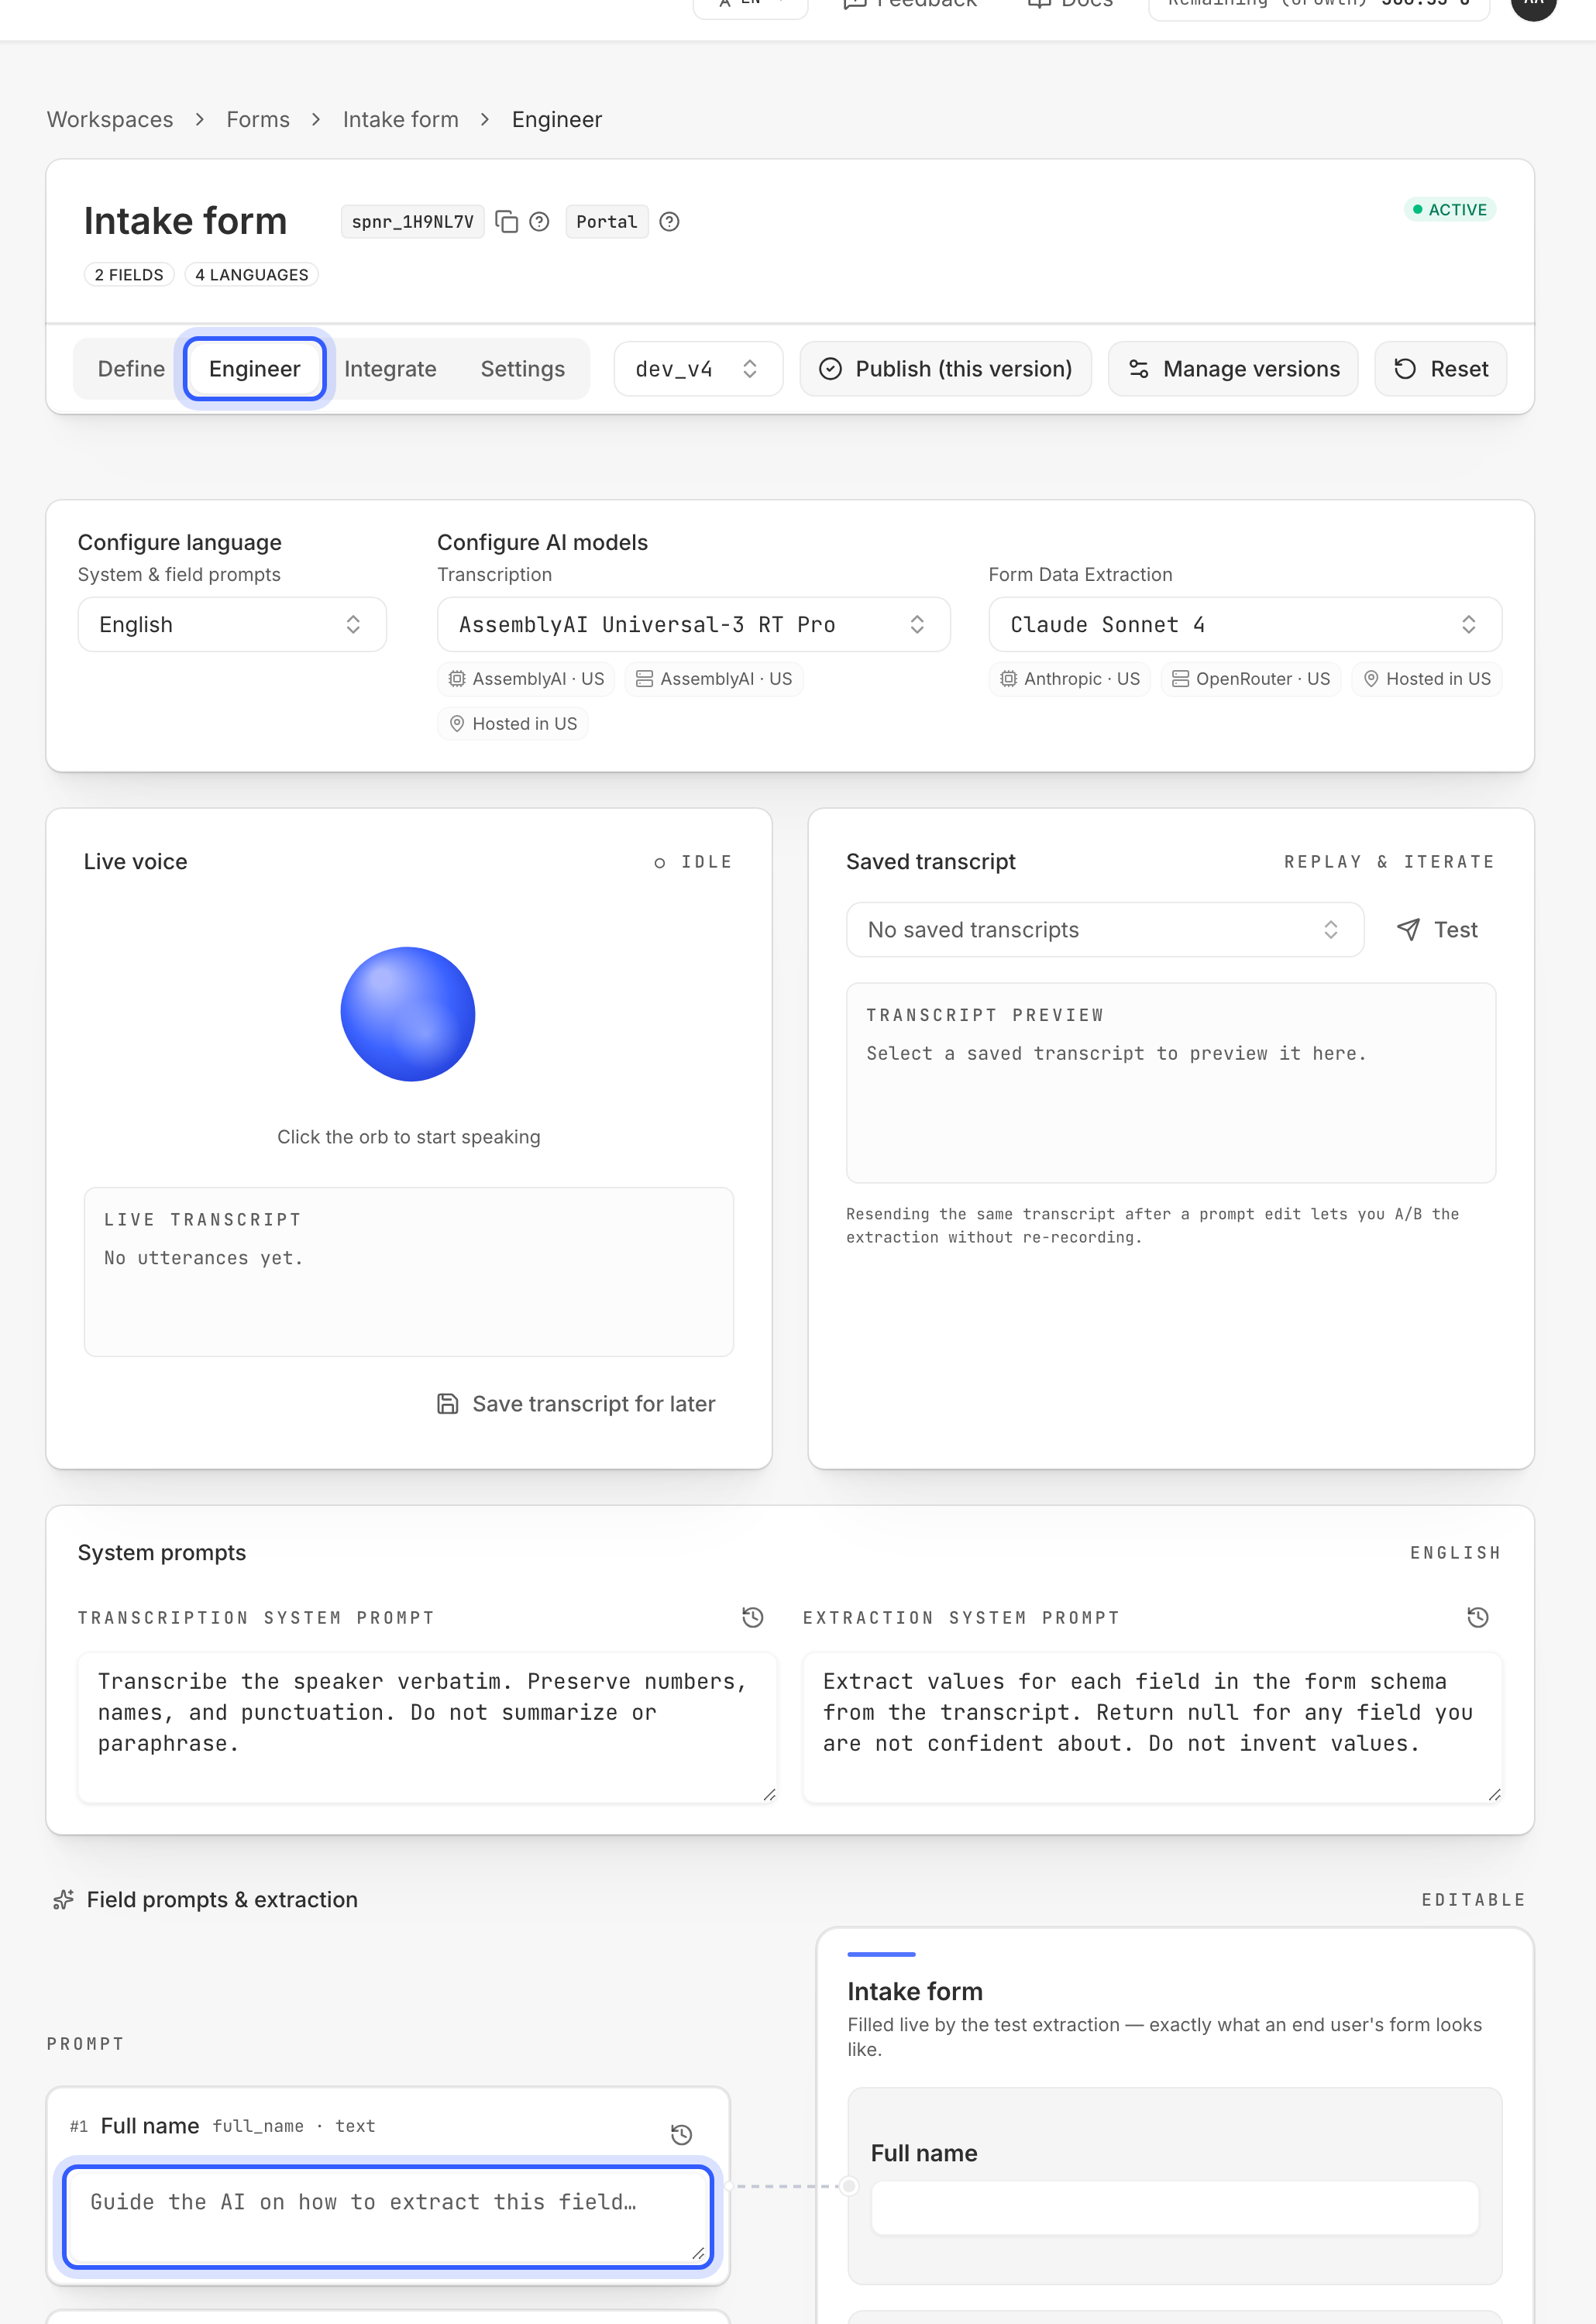
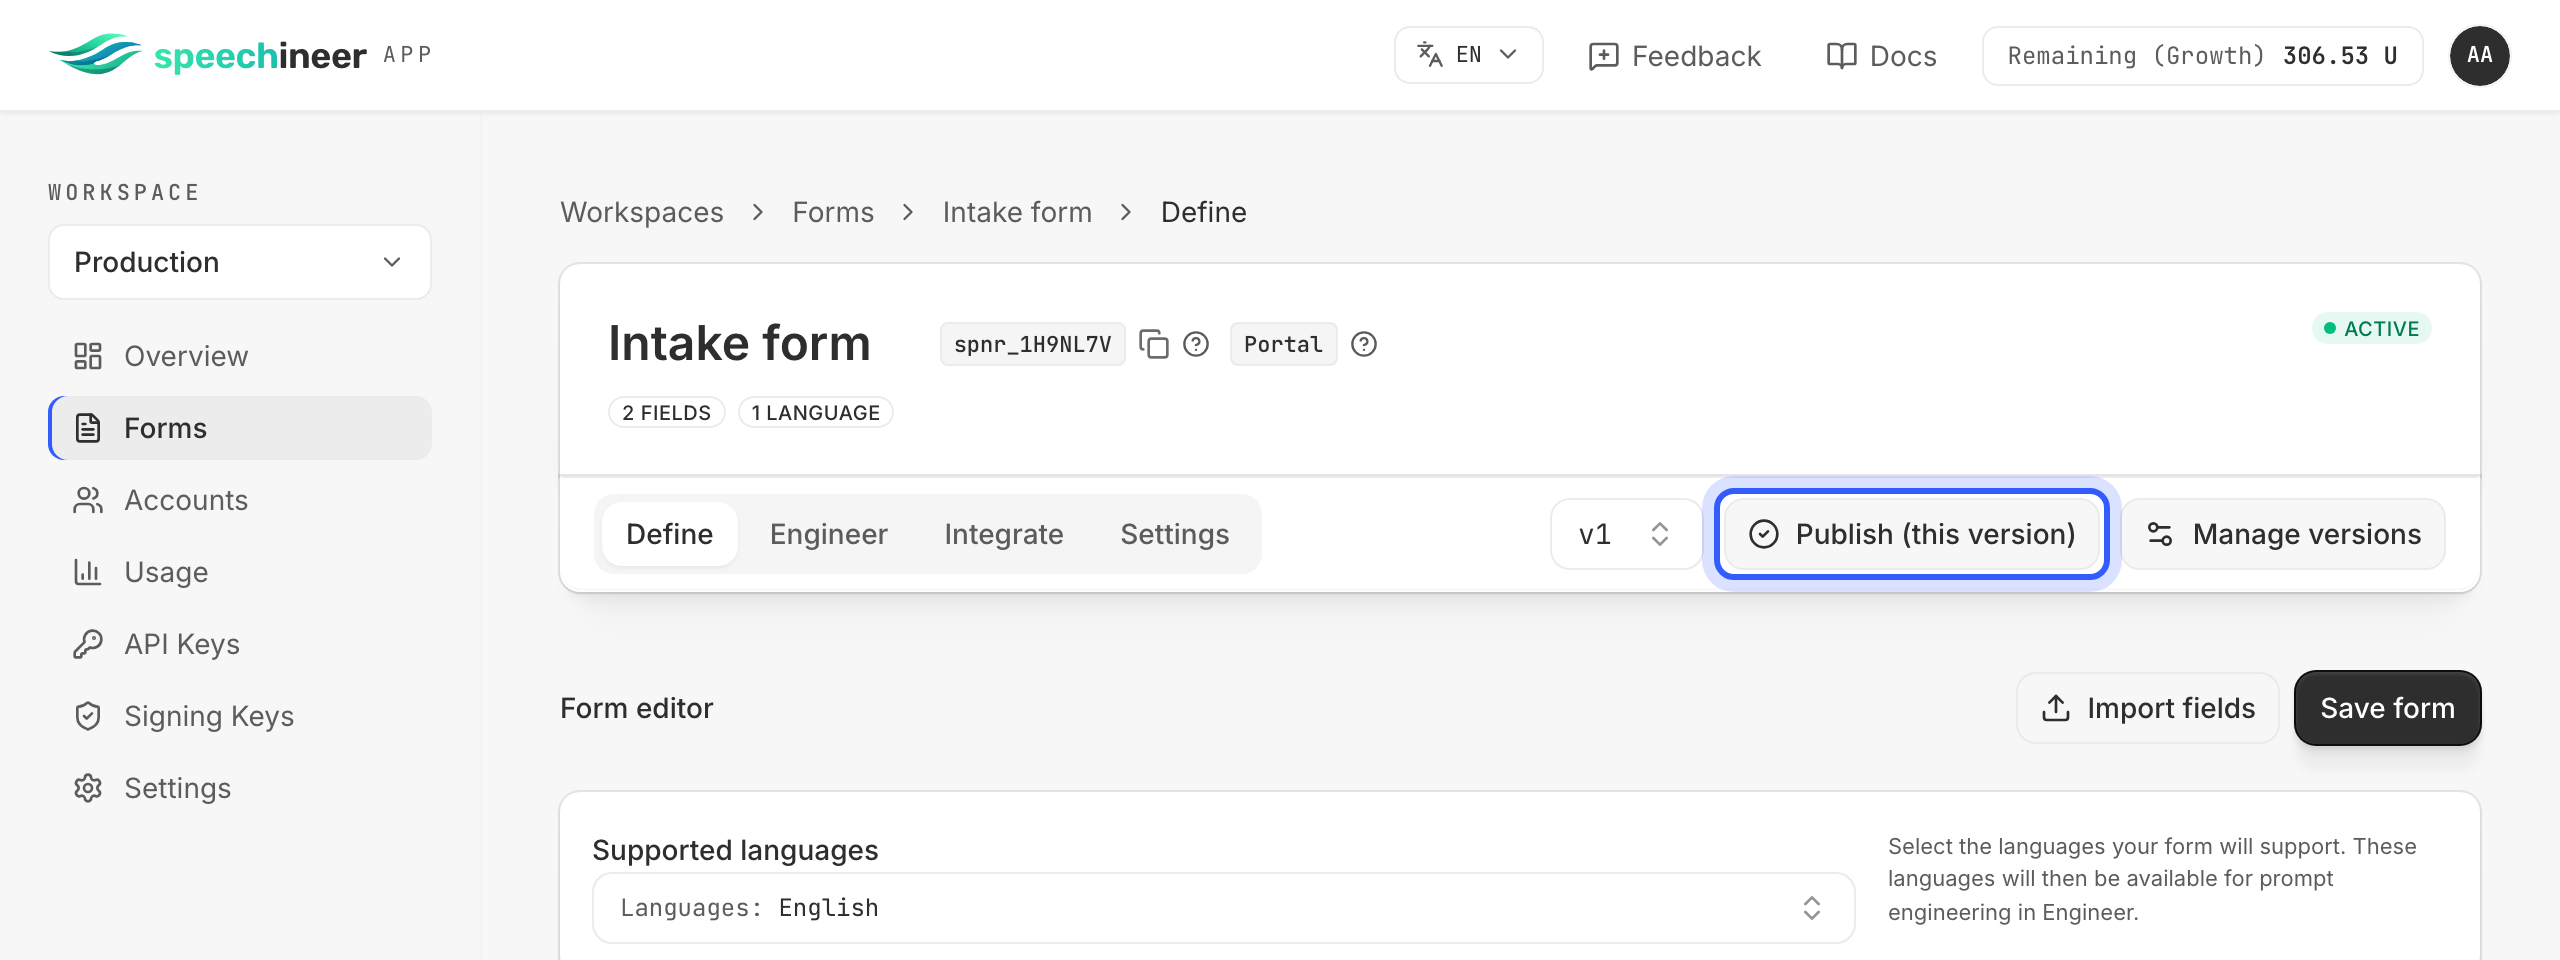
Finally, publish the version.
Warning
Additional information in
3. Create an API key
Open API keys and create a key.
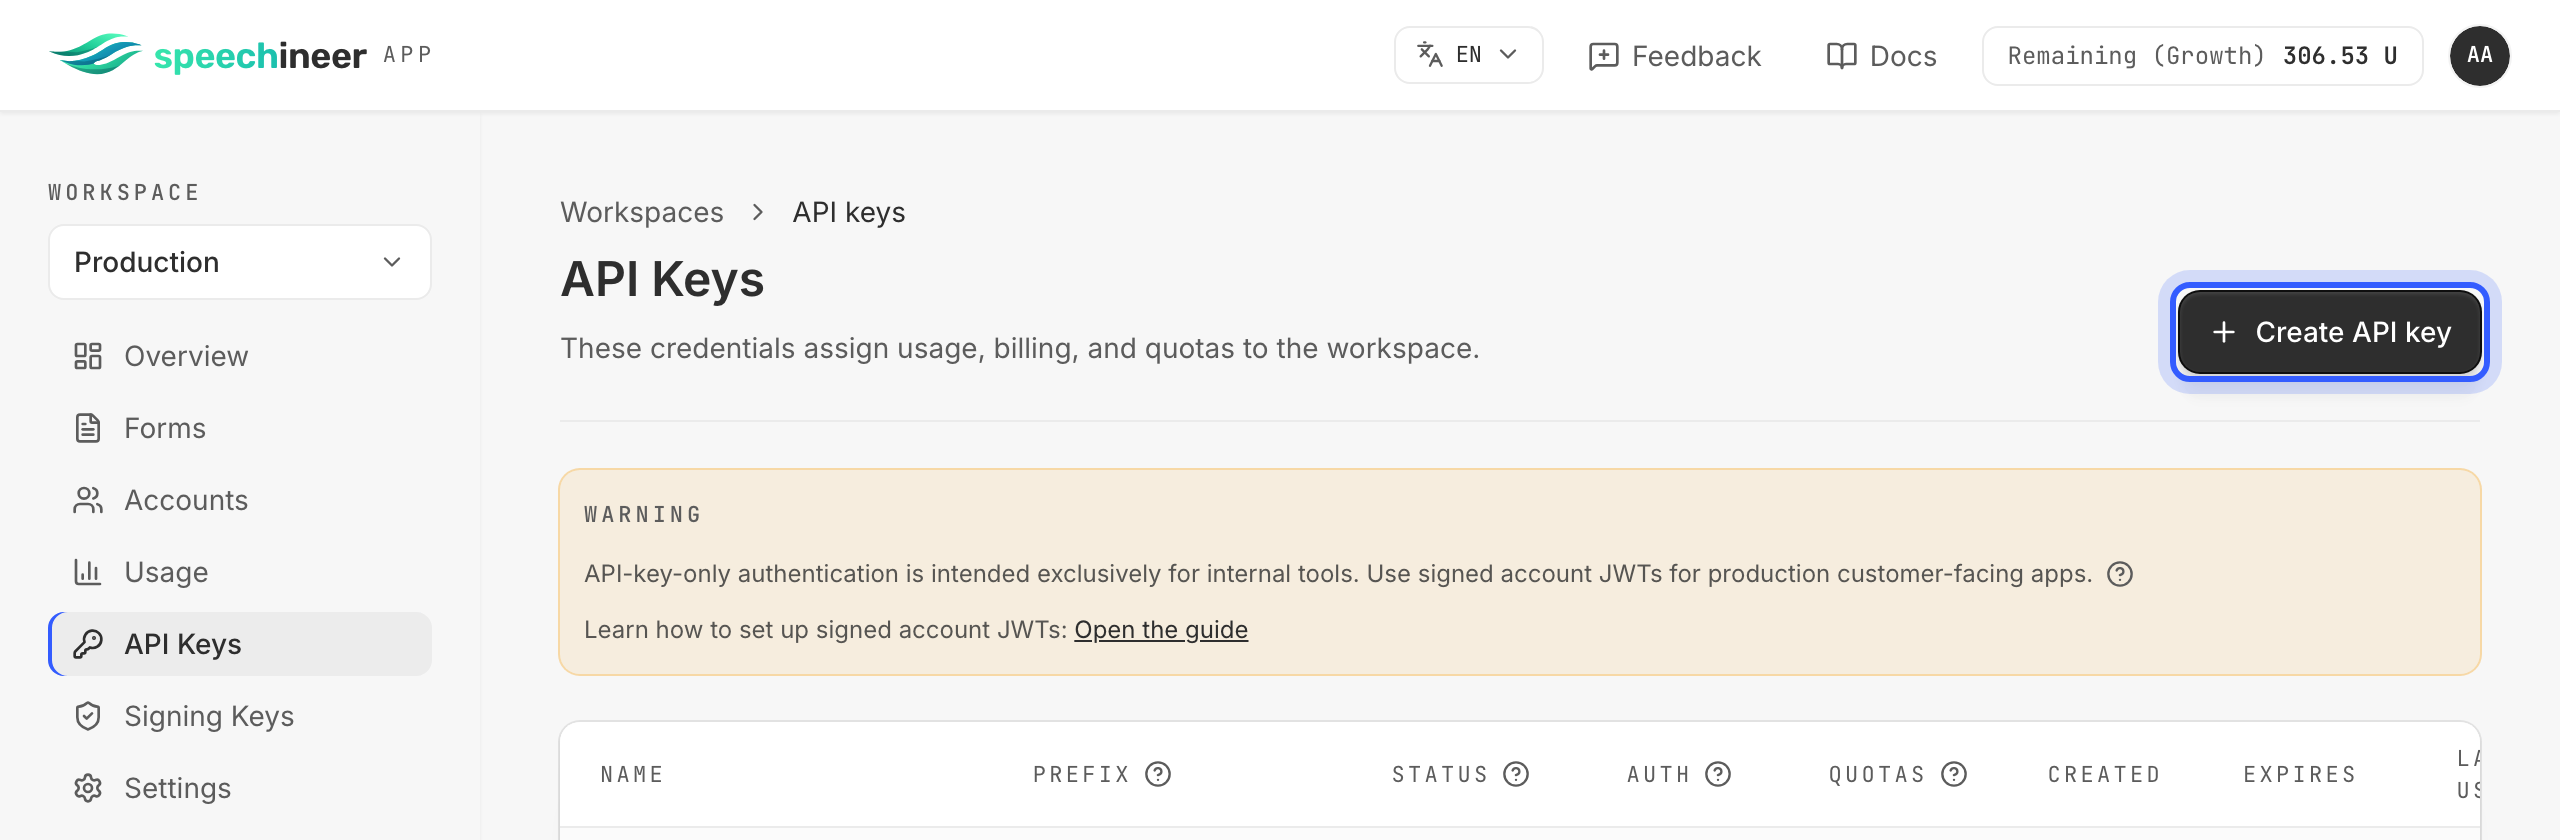
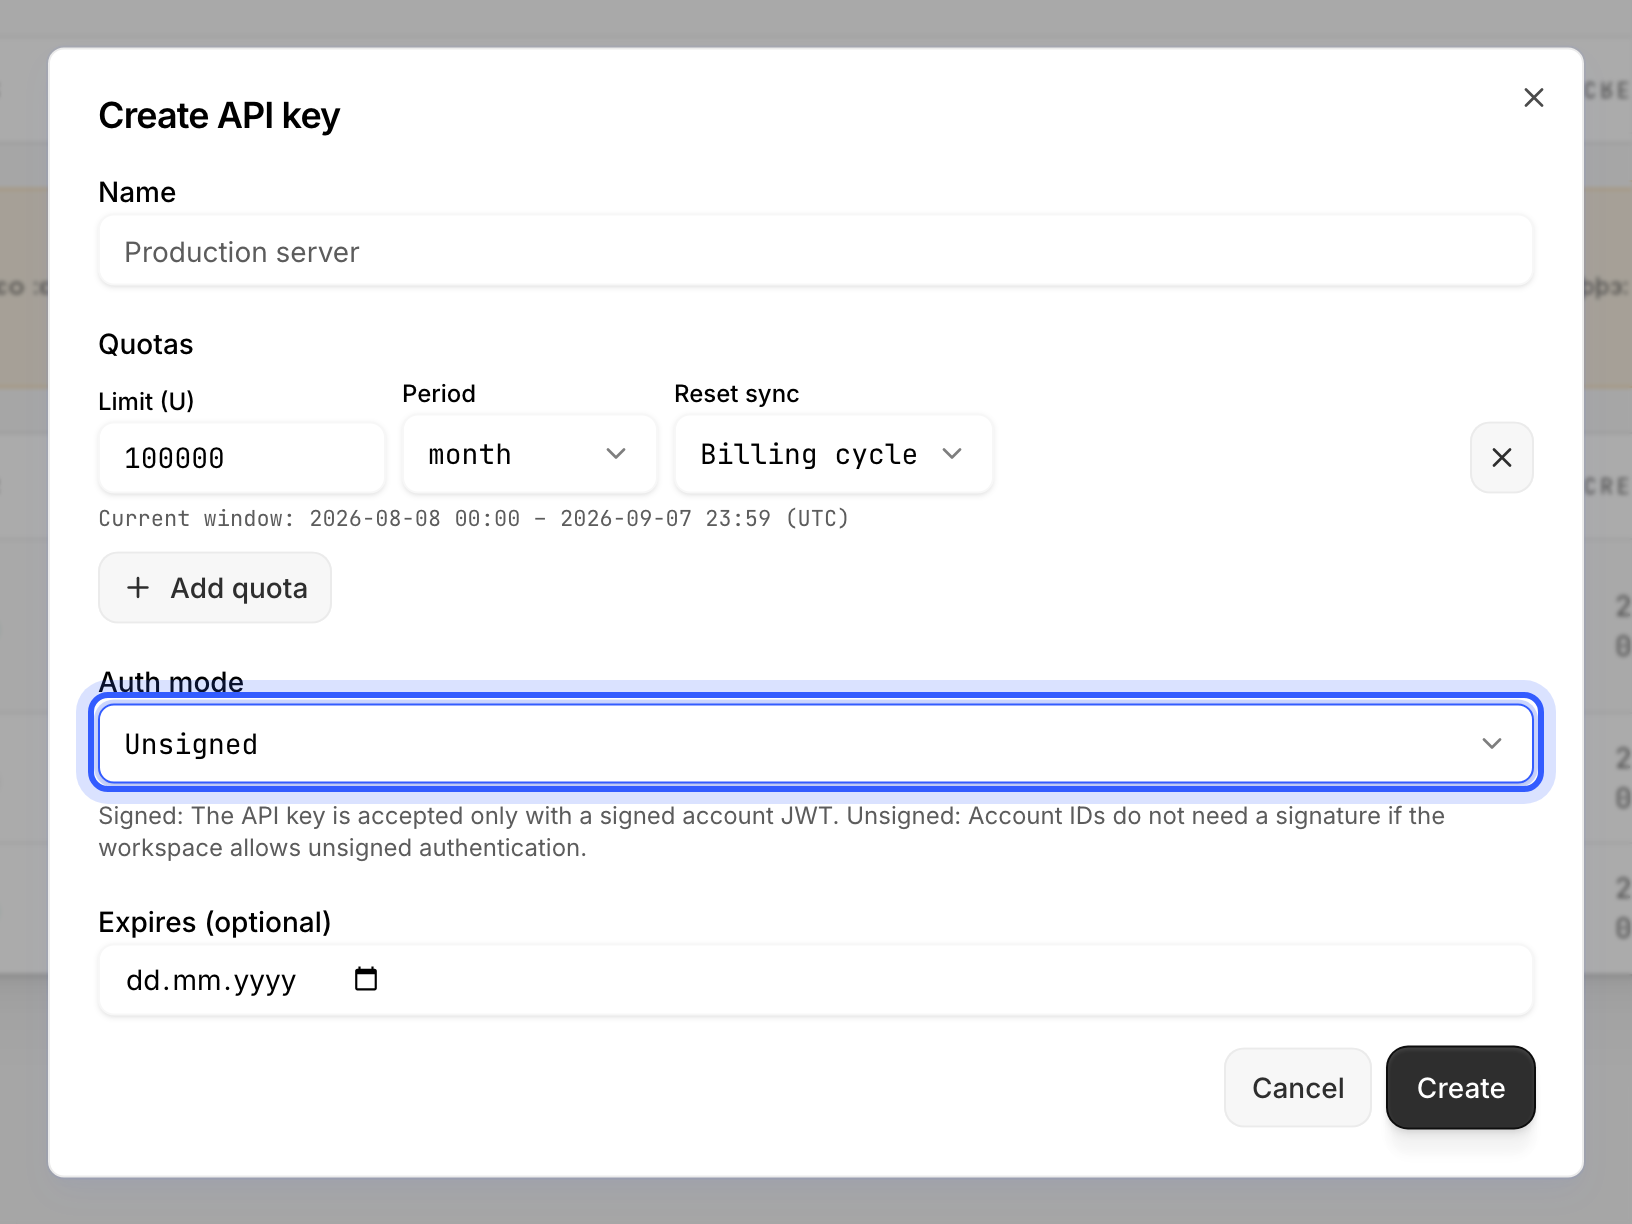
In the dialog, choose Unsigned. An Unsigned key rides in your frontend, which is what you want for development and for public pages where nobody is logged in anyway.
The key identifies your workspace in every call. When you later put a form behind a login, you will create a Signed key instead and mint short-lived tokens in your backend with a signing key.
Additional information in
4. Integrate the SDK
Install the package for your framework:
npm install @speechineer/reactnpm install @speechineer/angularnpm install @speechineer/jsThen add one session and one button to your form. Use the switch to compare an example form as it is today with the same form once Speechineer is in — your markup renders exactly as before, because Speechineer never renders anything of its own.
import { useForm } from "react-hook-form";import { useSpeechToForm } from "@speechineer/react"; export function IntakeForm() { const { register, handleSubmit, setValue } = useForm(); const voice = useSpeechToForm({ form: { source: "workspace", key: "spnr_a1b2c3d", version: "v1", language: "en" }, onFieldValue: (id, value) => setValue(id, value), }); return ( <form onSubmit={handleSubmit(save)}> <label>Full name <input {...register("full_name")} /></label> <label>Email <input type="email" {...register("email")} /></label> <label>Insurance <select {...register("insurance")}> <option>None</option><option>Public</option><option>Private</option> </select> </label> <button type="submit">Save</button> <button type="button" onClick={voice.isListening ? voice.stop : () => void voice.start()}> {voice.isListening ? "Stop" : "Speak"} </button> </form> );}added · changed — everything else is untouched.
import { injectSpeechToForm } from "@speechineer/angular"; @Component({ selector: "intake-form", template: ` <form [formGroup]="form" (ngSubmit)="save()"> <label>Full name <input formControlName="full_name" /></label> <label>Email <input type="email" formControlName="email" /></label> <button type="submit">Save</button> <button type="button" (click)="voice.isListening() ? voice.stop() : voice.start()"> {{ voice.isListening() ? "Stop" : "Speak" }} </button> </form> `,})export class IntakeForm { readonly form = new FormGroup({ full_name: new FormControl(""), email: new FormControl(""), }); readonly voice = injectSpeechToForm({ form: { source: "workspace", key: "spnr_a1b2c3d", version: "v1", language: "en" }, onFieldValue: (id, value) => this.form.get(id)?.setValue(value), });}added · changed — everything else is untouched.
<form id="intake"> <label>Full name <input name="full_name" /></label> <label>Email <input name="email" type="email" /></label> <button type="submit">Save</button> <button type="button" id="speak">Speak</button></form> <script type="module"> import { createClient } from "@speechineer/js"; const speechineer = createClient({ apiKey: "spnr_live_…", account: { key: currentUser.id } }); const session = speechineer.speechToForm({ form: { source: "workspace", key: "spnr_a1b2c3d", version: "v1", language: "en" }, onFieldValue: (id, value) => { const input = document.querySelector(`#intake [name="${id}"]`); if (input) input.value = String(value ?? ""); }, }); const speak = document.querySelector("#speak"); speak.onclick = () => (session.getState().isListening ? session.stop() : session.start()); session.subscribe((state) => (speak.textContent = state.isListening ? "Stop" : "Speak"));</script>added · changed — everything else is untouched.
Then create the client once, at the root of your app, with the API key from step 3 and the account of the current user. The framework you selected above is selected here as well.
// main.tsx — once, around your app.
import { SpeechineerProvider } from "@speechineer/react";

<SpeechineerProvider
  apiKey={import.meta.env.VITE_SPEECHINEER_API_KEY}             // the Unsigned API key
  account={{ key: currentUser.id, pseudonym: currentUser.name }} // who this end user is
>
  <App />
</SpeechineerProvider>// app.config.ts — once.
import { provideSpeechineer } from "@speechineer/angular";
export const appConfig: ApplicationConfig = {
providers: [
provideSpeechineer({
apiKey: environment.speechineerApiKey, // the Unsigned API key
account: { key: currentUser.id, pseudonym: currentUser.name }, // who this end user is
}),
],
};Note
Warning
full_name, email and so on — are the ids of the workspace form you created in step 2. That is the whole contract between the two.Additional information in
5. Test
You are ready to speak your first values into the form:
- Serve your app over HTTPS or on
http://localhost. - Press the button you added. The browser asks for the microphone once.
- Talk. The session connects, and finished values arrive one by one — a refined value replaces the earlier one.
Warning
http://192.168.… will not work.Tip
Additional information in