
Authentication and usage
Accounts
An account is the end user a session runs for — a person, a tenant, a device; you decide what it means for your product, and that is the one metering decision you make in code. Every unit is attributed to an account, and a cap per user is a cap on an account.
Warning
Note
Anything that identifies one end user of your product stably can be an account. A few shapes that work well:
- One account per end user — the default. Usage and limits follow the person.
- One account per customer organisation — for multi-tenant B2B: the organisation is what you meter and cap, however many seats it has.
- Anonymous visitors (who may sign up later) — base the key on something that survives their return: a value you store in their browser, or a fingerprint of their device, so the same visitor keeps the same account across unauthenticated visits. If they sign up, keep that key as the account key: what they spent before and after signing up stays one account.
Additional information in
Create an account
An account comes to exist in one of three ways — each has its section below:
- In code — the first session that names an account key creates the account if none exists yet.
- In the workspace — with Create account.
- By request from your backend — a request carrying your secret key creates or updates it.
So you do not have to create accounts up front. Creating one ahead of time is only useful to give it a display name or a cap before its first session — from the workspace, or from your backend.
In code
Your client names the account when it starts a session — through its account option, or through the account carried by the token your backend signed. If no account with that key exists in the workspace yet, the session creates it, with a pseudonym derived for you.
Additional information in
In the workspace
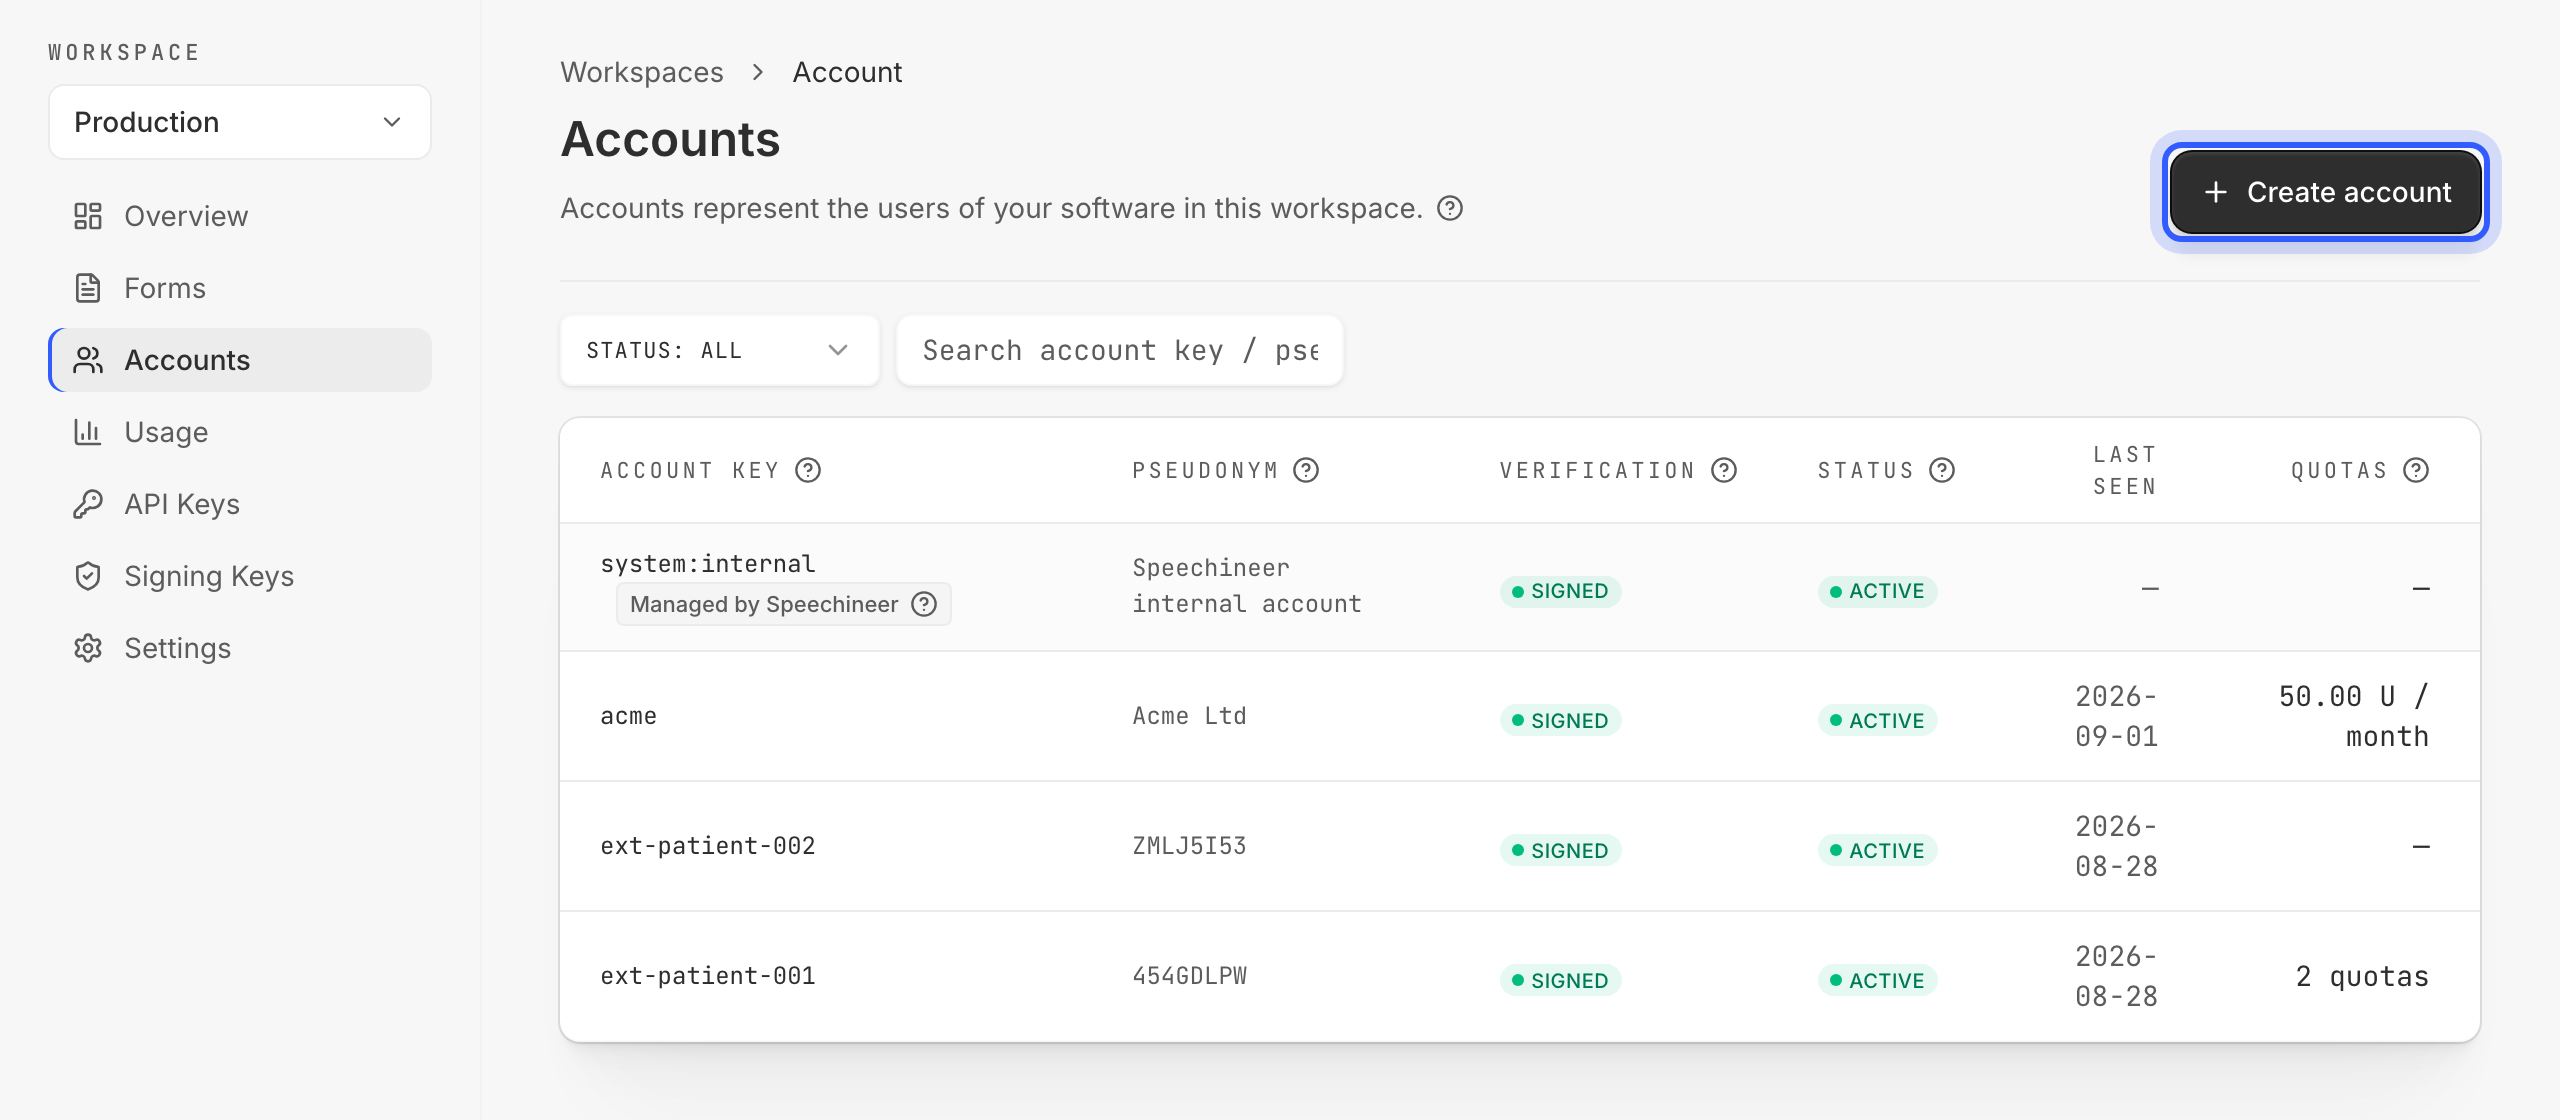
Accounts lists every account seen so far — its pseudonym, whether it authenticated Signed or Unsigned, its status, when it was last seen and its quota. Click Create account, enter the account key and, if you want, its quotas.
By request from your backend
A request to the accounts resource, authenticated with your secret key, creates the account if it does not exist and updates it otherwise. The secret key is a server-side credential — the short-lived session tokens your users' browsers carry are not accepted here:
- Create a secret key on the workspace's Settings page (Security tab). It is shown in full exactly once — store it in your backend's secret manager, and never ship it to a browser.
- Send the request, addressed by account key, with the secret key as the bearer value — there is no token to mint:
PUT https://api.speechineer.com/api/v1/accounts/acme/
Authorization: Bearer <your secret key>
Content-Type: application/json

{ "account_pseudonym": "Acme Ltd",
"quotas": [ { "units_limit": "50.0", "period": "month" } ] }# SPEECHINEER_SECRET_KEY: created once on the workspace's Settings page (Security tab)
curl -X PUT https://api.speechineer.com/api/v1/accounts/acme/ \
-H "Authorization: Bearer $SPEECHINEER_SECRET_KEY" \
-H "Content-Type: application/json" \
-d '{"account_pseudonym":"Acme Ltd","quotas":[{"units_limit":"50.0","period":"month"}]}'// SPEECHINEER_SECRET_KEY: created once on the workspace's Settings page (Security tab)
const res = await fetch("https://api.speechineer.com/api/v1/accounts/acme/", {
method: "PUT",
headers: {
Authorization: `Bearer ${process.env.SPEECHINEER_SECRET_KEY}`,
"Content-Type": "application/json",
},
body: JSON.stringify({
account_pseudonym: "Acme Ltd",
quotas: [{ units_limit: "50.0", period: "month" }],
}),
});
const { data: account } = await res.json();import os
import requests
# SPEECHINEER_SECRET_KEY: created once on the workspace's Settings page (Security tab)
res = requests.put(
"https://api.speechineer.com/api/v1/accounts/acme/",
headers={"Authorization": f"Bearer {os.environ['SPEECHINEER_SECRET_KEY']}"},
json={"account_pseudonym": "Acme Ltd", "quotas": [{"units_limit": "50.0", "period": "month"}]},
)
account = res.json()["data"]The reply returns the account — key, pseudonym, verification, status, quotas, first and last seen.
Additional information in
Manage an account
Every account has settings in the workspace, and the same fields can be changed by request from your backend: the address used to create the account also reads it, with its usage this cycle, updates it and archives it. Three fields are yours to set — the account key itself is not one of them: it is what the client named when the account was created, in its account option or, with Signed authentication, in the account_key claim of the token your backend minted.
Pseudonym
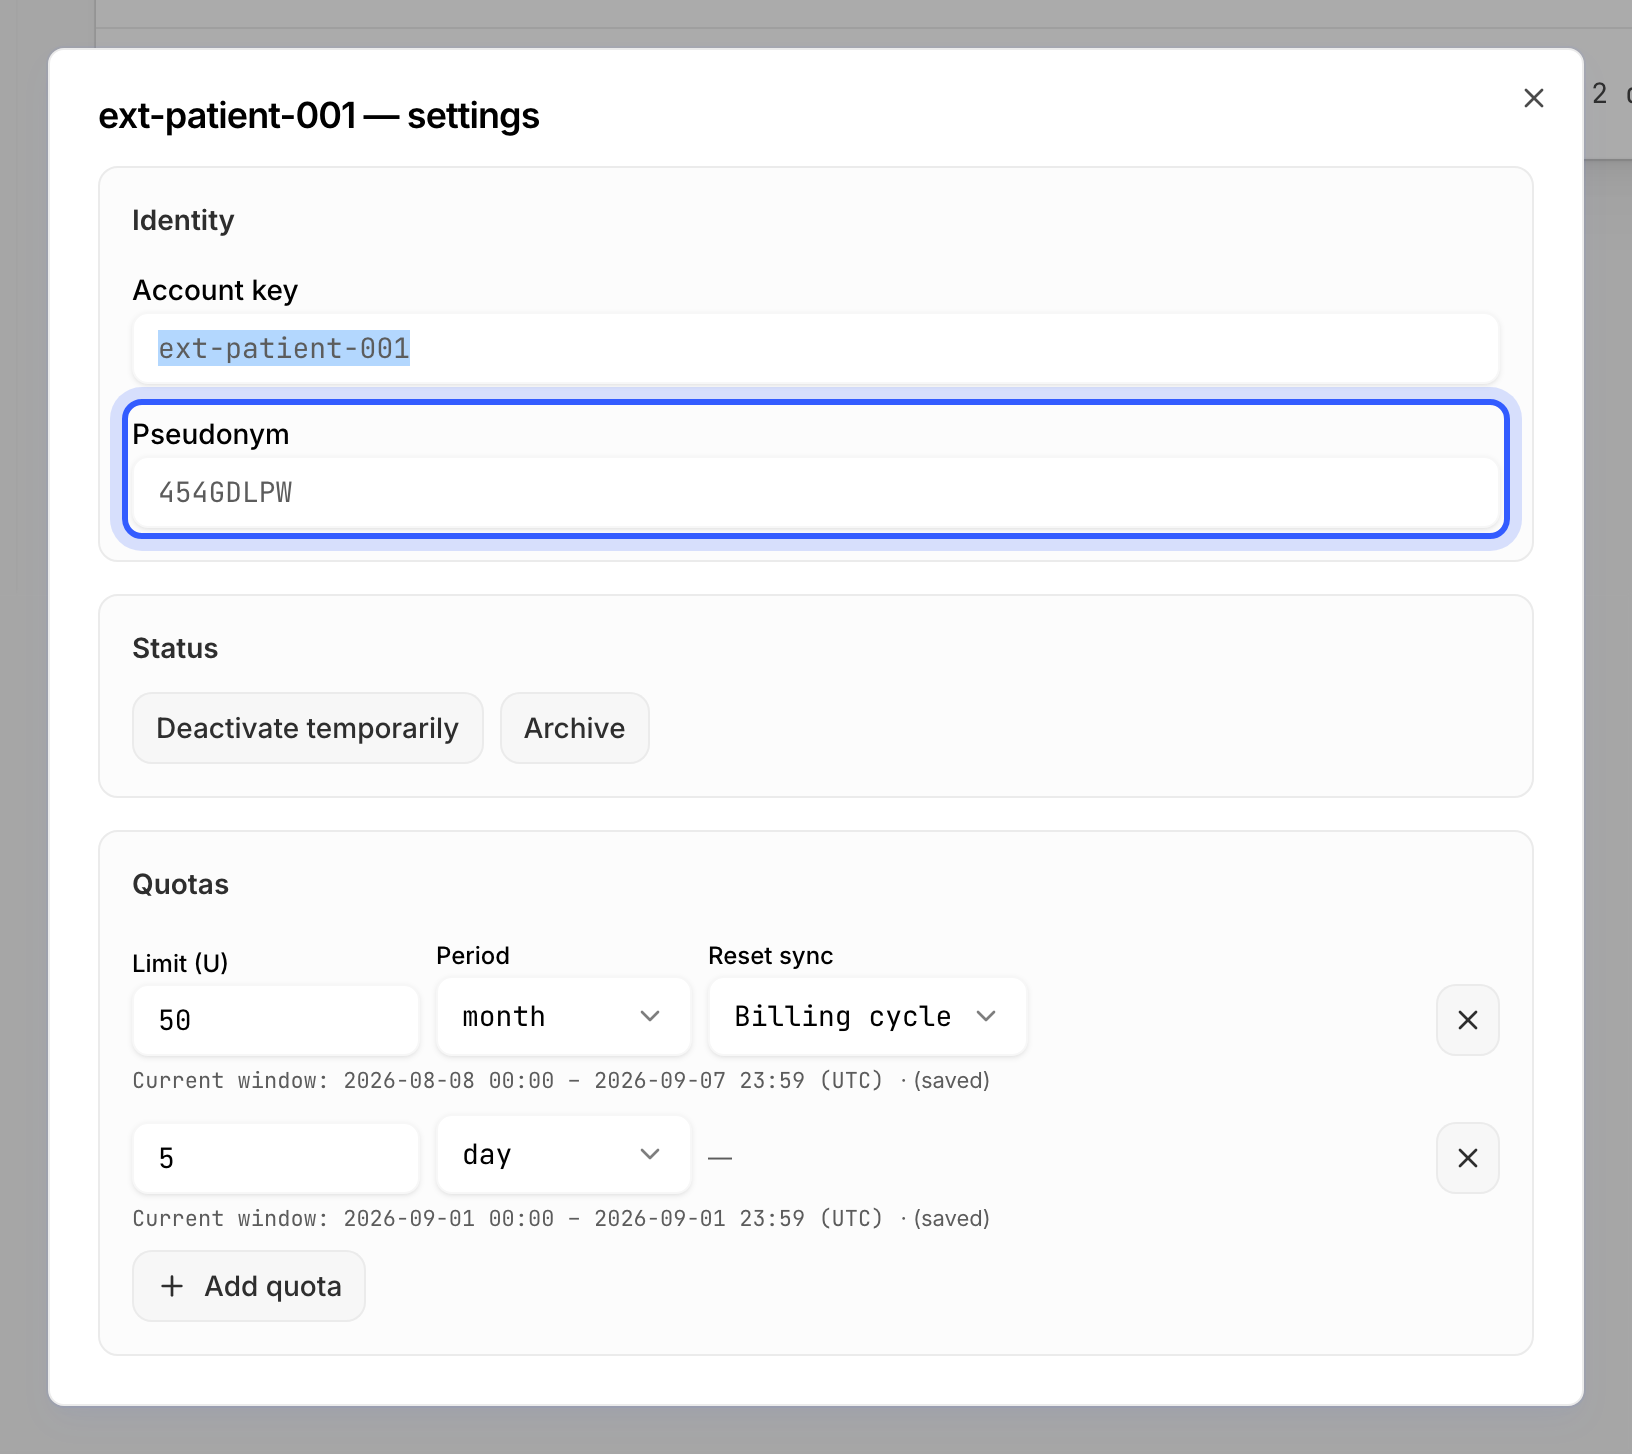
The name the workspace displays for the account instead of its account key. One is generated when the account is first seen; replace it with something you recognise — the customer's or the user's name, say — when the account key is an opaque id such as a database id or a fingerprint, so the account is readable in the accounts list and the usage breakdowns. The pseudonym is a label only: the client keeps naming the account by its account key.
Status
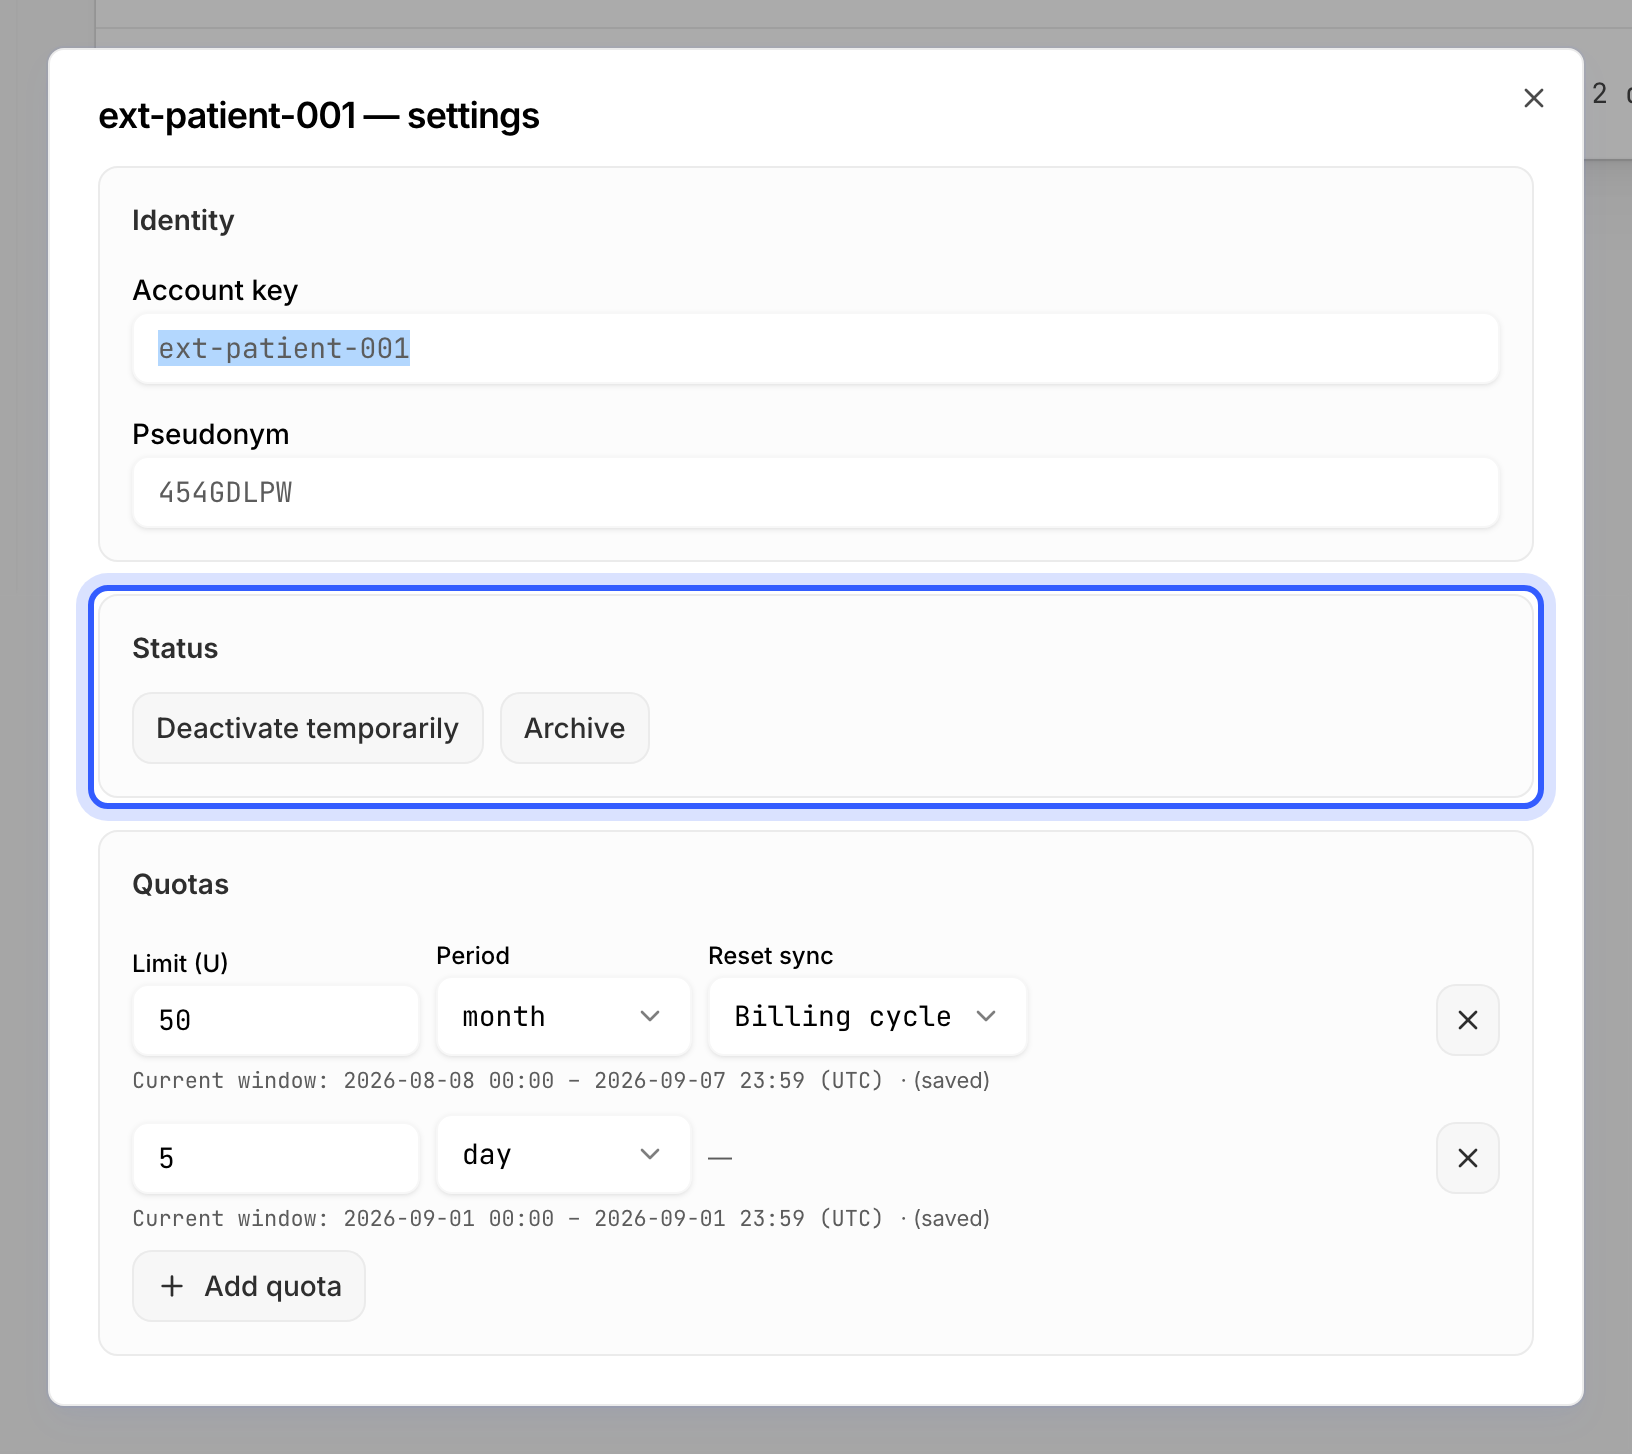
Deactivate temporarily pauses the account — its sessions fail while it is paused — and can be reversed; Archive is final and keeps the usage history.
Quotas
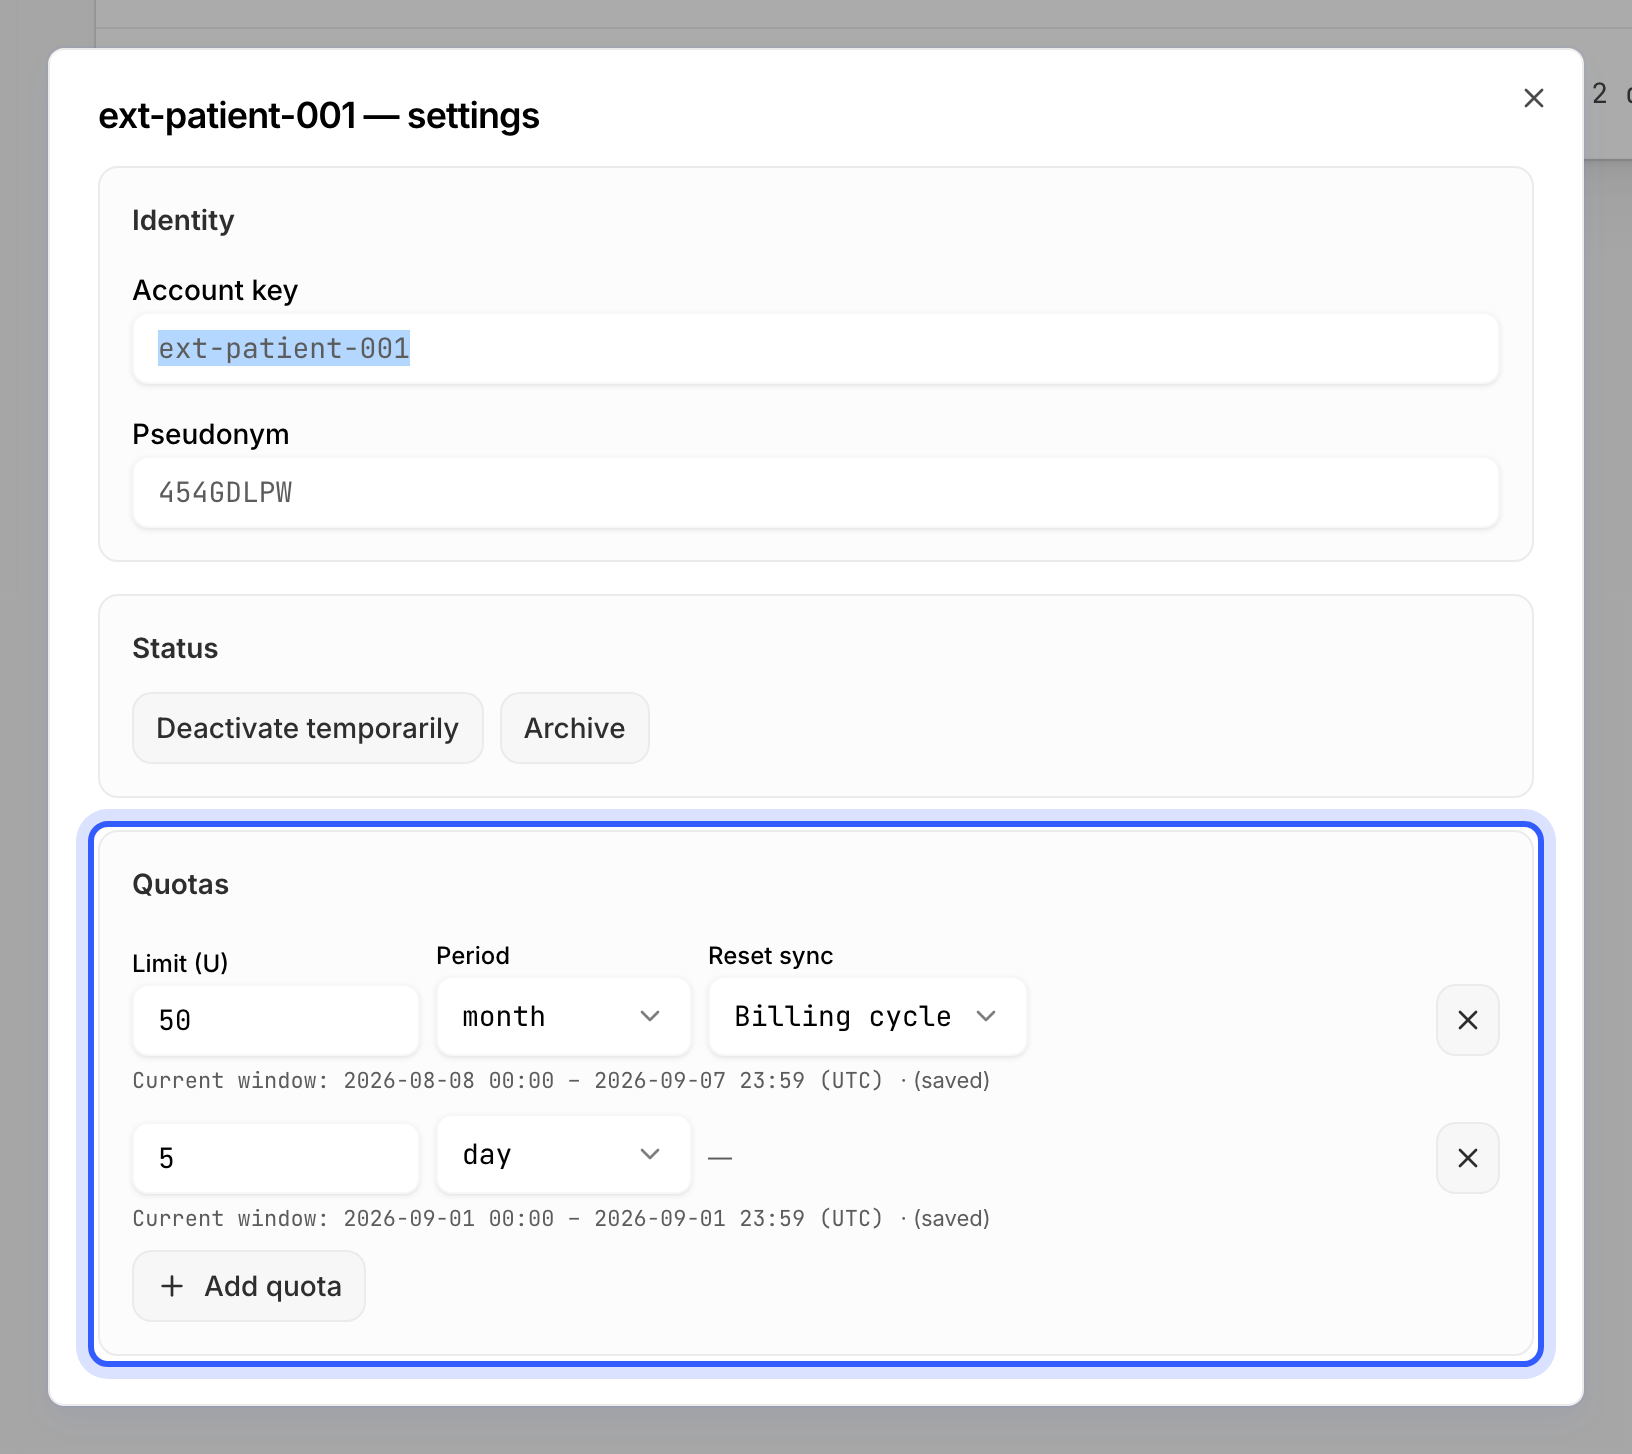
A quota is a limit — a number of units this account may spend — within a period: a day, a week, a month, a year, or its whole lifetime (total). For a weekly, monthly or yearly quota you also choose whether the period follows the calendar or your billing cycle; a daily or total quota has no such choice. You can set several quotas on the same account at the same time — a monthly budget and a daily brake, say. Every session has to fit within all of them: as soon as any one of them is used up, sessions are refused until that quota's period starts again, however much the others still have left.
The account above carries two: 50 units a month on the billing cycle — the share of the plan one customer is entitled to; and 5 units a day — a brake on one user's activity, so a single busy day cannot spend the month. A session that would cross either fails with ACCOUNT_QUOTA_EXCEEDED. Rather than set the same quotas on every account by hand, set a default for every new account of the workspace once, under Settings › Quotas.